In this article we are going to create chatbot using Streamlit and GPT-4.
In our previous article Creating Your Own ChatGPT: A Step-by-Step Guide Using GPT-4 in Python, We have used HTML file to render our chatbot UI. In this tutorial, we are not going to use html/js/css. Our entire code will be in python.
Streamlit
Streamlit is a web based framework developed in python language. It is being widely used to build data driven applications. It has gained strong popularity among Data scientists as it let them demonstrate their work without the need to any front-end code. You can checkout about streamlit in detail here How to use Streamlit in Python.
OpenAI
OpenAI‘s product line which includes GPT-3/CHATGPT, have been in the news for a long time, and their latest addition to the line, GPT-4 is being widely appreciated for its performance and capabilities. We will also be using GPT-4 in our Chatbot with Streamlit today.
Prerequisites
To get going, we need the following items.
- OpenAI API key, Which can be accessed once you create your account on OpenAI
- Streamlit library: Install it via PIP
pip install streamlit - Streamlit Chat: External component for Chat UI, Created by AI-Yash.
Install it via PIP:pip install streamlit_chat
Coding Section
Chatbot using Streamlit and GPT-4, Copy down the below code in your editor and save it as app.py
import streamlit as st
from streamlit_chat import message
import openai
openai.api_key = 'YOUR_OPENAI_API_KEY'
st.set_page_config(
page_title="Chatbot",
page_icon=":robot:"
)
st.header("Chatbot Demo using `Streamlit and GPT-4`")
# Storing GPT-4 responses for easy retrieval to show on Chatbot UI in Streamlit session
if 'generated' not in st.session_state:
st.session_state['generated'] = []
# Storing user responses for easy retrieval to show on Chatbot UI in Streamlit session
if 'past' not in st.session_state:
st.session_state['past'] = []
# Storing entire conversation in the required format of GPT-4 in Streamlit session
if 'total_conversation' not in st.session_state:
st.session_state['total_conversation'] = [{'role':'system','content':'I want you to act as a travel guide. I will write you my location and you will suggest a place to visit near my location. In some cases, I will also give you the type of places I will visit. You will also suggest me places of similar type that are close to my first location. Do not make answers longer than 50 words. Your tone is friendly'}]
def query(user_text):
response = openai.ChatCompletion.create(
model="gpt-4",
messages=st.session_state.total_conversation
)
message = response.choices[0].message.content
# Adding bot response to the
st.session_state.total_conversation.append({'role':'system','content':message})
return message
def get_text():
input_text = st.text_input("You: ","Hello, How are you?", key="input")
return input_text
user_input = get_text()
if user_input:
output = query(st.session_state.total_conversation.append({'role':'user','content':user_input}))
st.session_state.past.append(user_input)
st.session_state.generated.append(output)
if st.session_state['generated']:
for i in range(len(st.session_state['generated'])-1, -1, -1):
message(st.session_state["generated"][i], key=str(i))
message(st.session_state['past'][i], is_user=True, key=str(i) + '_user')
Code language: Python (python)Let’s break down our code now
querymethod uses data fromst.session_state.total_conversationand interact with GPT-4 via API call using latest user message.- In
st.session_state.total_conversation, we have given it a prompt to act like a travel guide. You can replace it with a different prompt and checkout the output. For list of prompts, Checkout Prompts chat get_textmethod takes user input from the input area. For default, We have used Hello, How are you ?. You can replace it with your usecase.- If the user provides an input then we use that input to interact with GPT-4 and use the GPT-4 response as our bot response in the UI.
- In the last if condition, We are checking if we have any data in our GPT-4 response list or not. If there is data then we use that data to show bot response in streamlit chat UI.
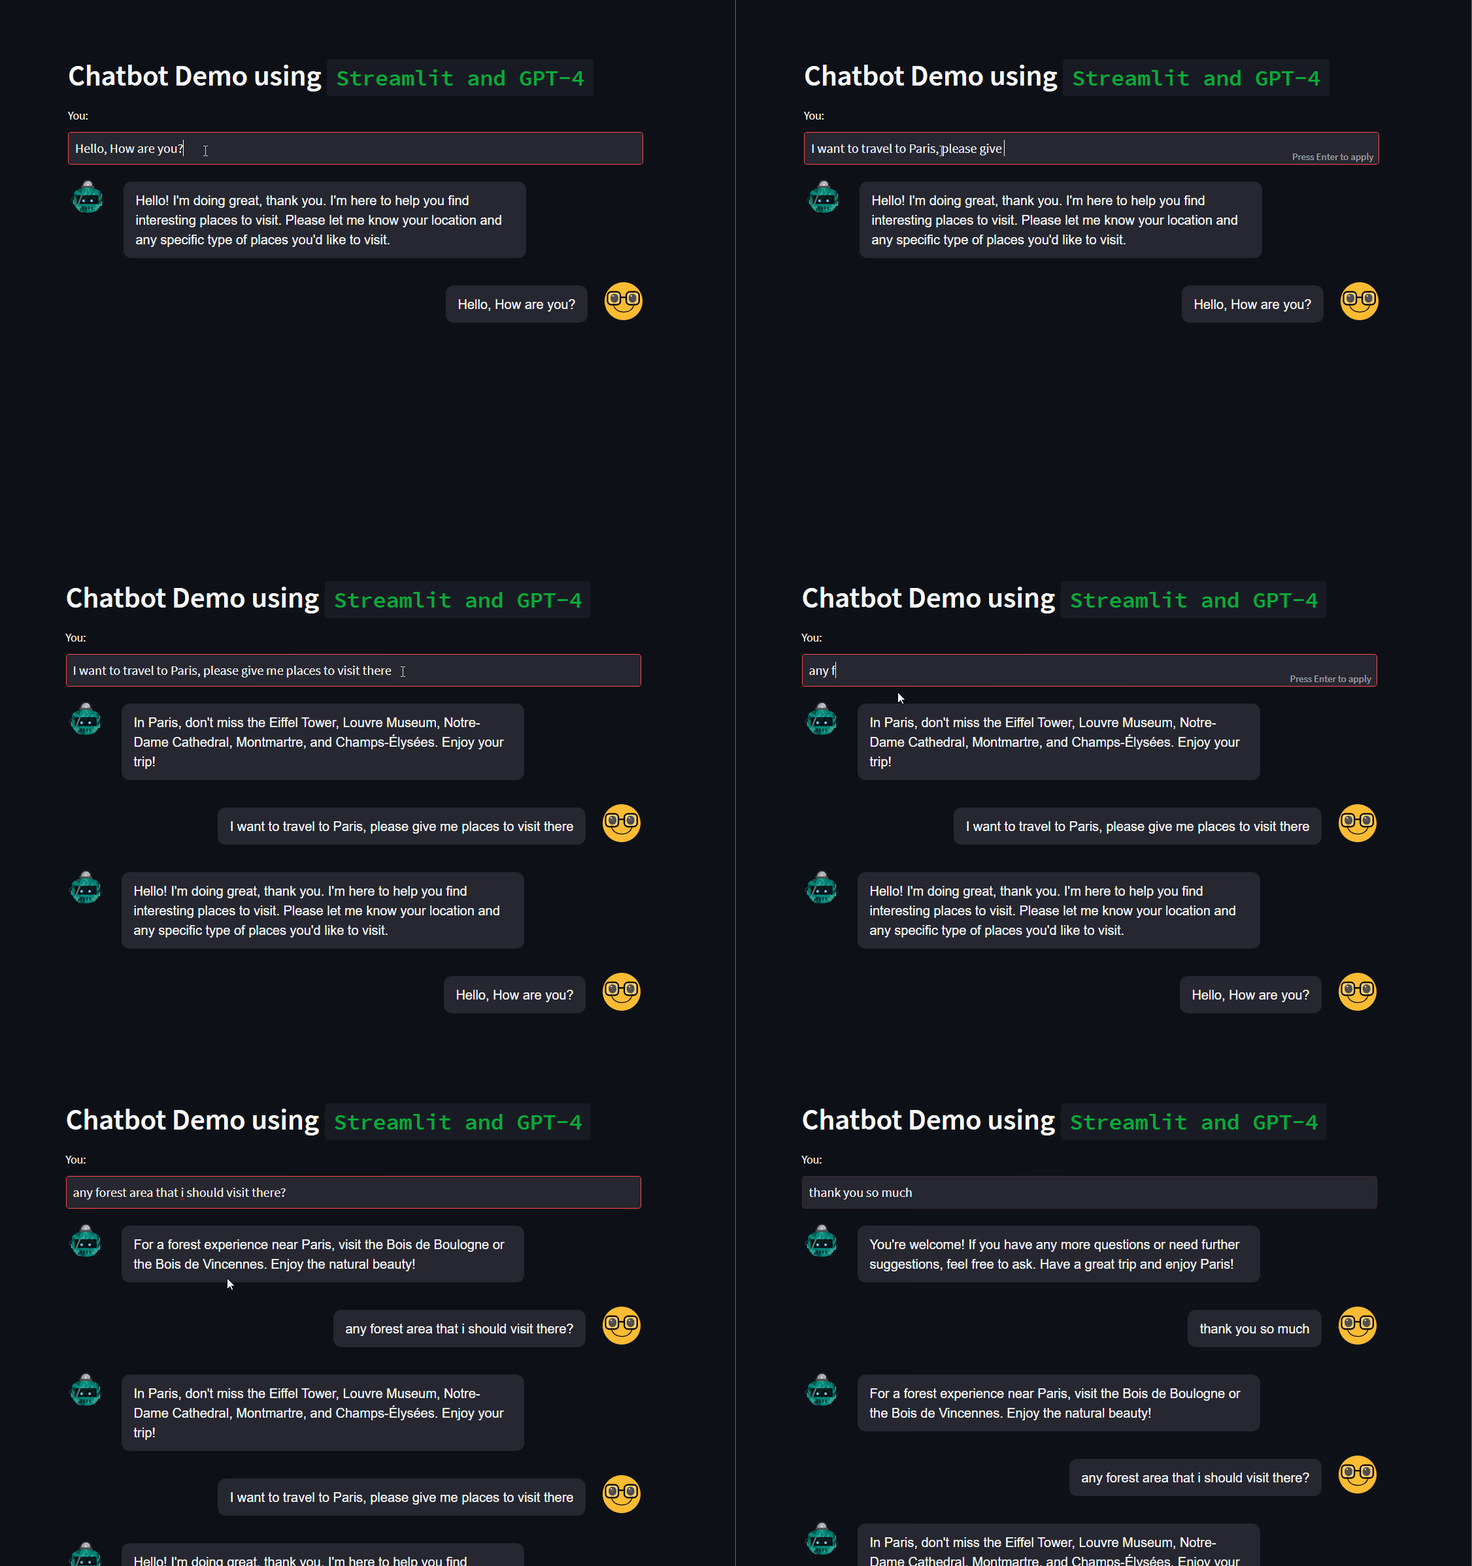
We have understood the code now, Let’s try to run our code and see its functionality. To run the code, type streamlit run app.py or <FILENAME_YOU_USED_TO_SAVE_YOUR_CODE>

That’s it, We now have a Chatbot using Streamlit and GPT-4 without any frontend code.
You can find the code on 🖥️ GitHub, Feel free to give ⭐


