Get Set Django
In this tutorial, You’ll learn how to get started with Django. This tutorial is part 1 of the 3 part tutorial series. So make sure you read all of them to have a basic understanding of how to get a start in Django.
Table Of Contents
What is Django?
According to the official Django website
Django is a high-level Python Web framework that encourages rapid development and clean, pragmatic design. Built by experienced developers, it takes care of much of the hassle of Web development, so you can focus on writing your app without needing to reinvent the wheel. It’s free and open source.
Requirements
Anaconda – Anaconda is a free and open-source distribution of the Python and R programming languages for scientific computing, that aims to simplify package management and deployment. Package versions are managed by the package management system conda. Or you could install python manually from their official website
Python – Python is a general-purpose interpreted, interactive, object-oriented, and high-level programming language. It was created by Guido van Rossum during 1985- 1990. Like Perl, Python source code is also available under the GNU General Public License (GPL). For more information, you can visit https://www.python.org
Django – “Django is a high-level Python Web framework that encourages rapid development and clean, pragmatic design.”. We will install Django using conda.
Conda – Conda is an open source package management system and environment management system for installing multiple versions of software packages and their dependencies and switching easily between them. It works on Linux, OS X and Windows, and was created for Python programs but can package and distribute any software.
Editor and Terminal – You are free to choose any editor of your choice and you will use your normal command terminal.
Setup
Let’s make this quick!!
Install Anaconda – To get started with Django, you need to install Django first. There are many ways to do it but we will use Ananconda. You can download Anaconda from the given link and you’ll be surprised to see that Anaconda can be used for so many things other than Django. It’s a complete package. You’ll be surprised I bet that.
Create an environment using conda – You might be thinking that why do we need to create an environment and what is it’s use(Specially for the new programmers who have no Idea about the use of environment in Projects). Let’s take an example.
In your terminal type the following command
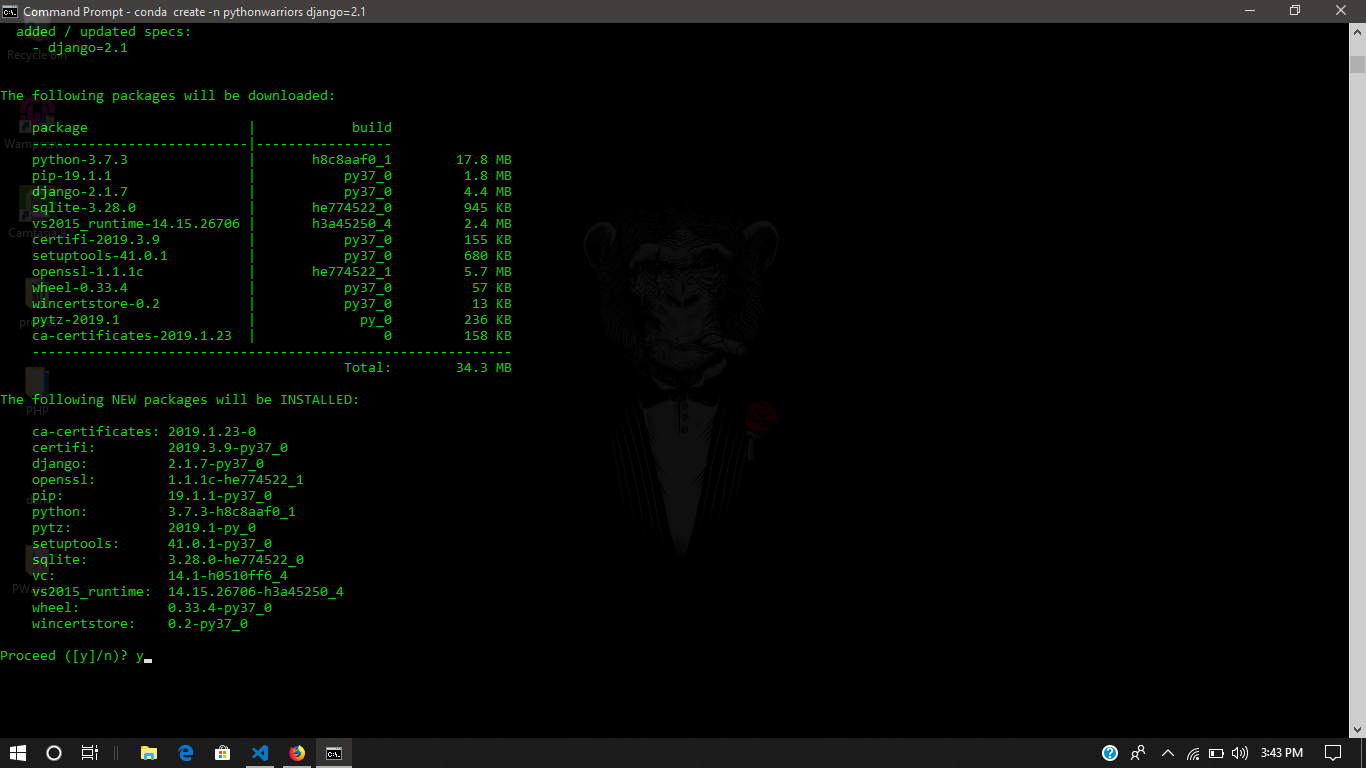
conda create -n yourenvname django=2.1
I have chosen pythonwarriors as my envname. Feel free to choose any name you like. After hitting enter, You will be presented with the following details as given in the image. Check if you have python and django there in the list. Because that’s what you need at the moment.

Now follow these steps
- Press
yto proceed. It’ll download all the files mentioned. If you want a lower python version you can install it using conda mentioning the python version as we mentioned for Django over here. - After successful installation. Activate your environment using command
activate yourenvname. You will now be able to see that in your command terminal your current directory has your environment name on the left enclosed within parenthesis.This shows that your environment is active. - For deactivation, you just need to type
deactivate.
Check if you have installed python and Django correctly or not.
In the command terminal,You need to type python, You will see python IDLE format inside your command terminal.
You now need to check for Django.For that, Just type this in python command terminal.
      >>>import django
      >>>django.VERSION
It’ll tell you about the Django version.
To exit from here type quit()
- Create a Django Project using the command terminal.
django-admin startproject firstProject
This would create a directory with the project name we just mentioned that is firstProject.
Go inside this project, You will findmanage.pyfile which is needed for every Django project to start and a folder of the same name as of our parent folder.
Starting the Development Server
Sounds bit heavy right? Like development server!! Man, I just installed Django now you want me to deal with the servers?
Don’t worry you don’t have to deal with any Server related work. You just need to start the server using a small piece of command python manage.py runserver. We start the server so that we can see our work on the browser. Afterall, that’s the main goal right! We are making a website in the end.
Important note: This command would only work if you are in the folder where your manage.py file is present.
If you perform all the instruction given above in the given manner, You’ll see this on your command terminal.
System check identified no issues (0 silenced).

You have 15 unapplied migration(s). Your project may not work properly until you apply the migrations for app(s): admin, auth, contenttypes, sessions.
Run 'python manage.py migrate' to apply them.
June 03, 2019 - 16:08:00
Django version 2.1.7, using settings 'firstProject.settings'
Starting development server at http://127.0.0.1:8000/
Quit the server with CTRL-BREAK.
Magic
You might be wondering why this section is called as Magic, since this is your first time dealing with all this and if you have not worked with django at all. Then get ready to be amazed because you are going to see your own made server working in your browser. Hope you are excited for it.
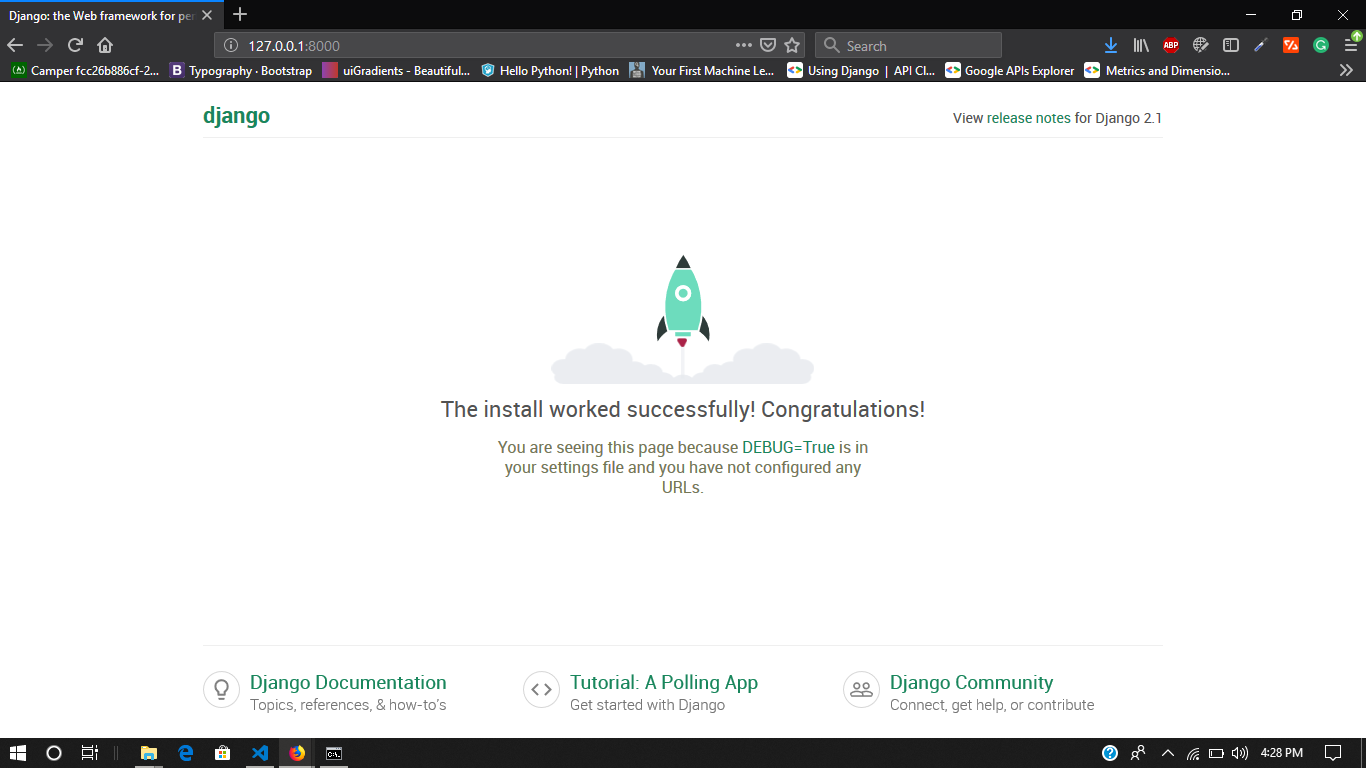
Okay! Now back to see it with your own eyes, without closing the command terminal, Go to your browser and type http://127.0.0.1:8000/. And voila! You just got your own Django server running on your system.

Well, that’s enough for getting started with Django, since anything over the limit is never good. Take a break and come back again and go through Get started with Django.
In the next coming tutorials, You’ll learn about the project structure and about the files that has been created during project creation time,create apps inside Django project, create models, interact with django-admin and lot more.
Django has a lot to offer. Feel free to check the official Django website and Keep visiting us, Coz We are here to help you in this fight!


