In our previous article How to connect Telegram with Rasa Chatbot, We showed you how you can connect Telegram with your Rasa Chabot model.
In this article you will connect your Rasa bot with WhatsApp with the help of Twilio. WhatsApp is a leader when it comes to social messaging apps and to have a chatbot model which you can connect to it gives you a leverage to connect to larger audience.
If you are new to Rasa, I strongly suggest you go through How to Create a ChatBot using Rasa and Python — A Step-by-Step Guide (Simple). Rasa provides a way for us to connect different social applications to our chatbot model.
For connecting WhatsApp and Rasa together, we would require few things
- Rasa boilerplate code – You can get from here How to Create a ChatBot using Rasa and Python — A Step-by-Step Guide (Simple)
- Twilio Account – WhatsApp does not provide APIs to connect it to third party services yet. We will use twilio to brige this gap, You can Setup your Twilio account here.
- Ngrok – Converts http network into https network for easy interaction with Telegram. Download Ngrok from here
Setting up Twilio
Items we require from Twilio
- Account SID
- Auth Token
- Sandbox whatsapp number
If you are done creating your Twilio account, create a project with Programmable SMS as a product. It’ll take you to your created project dashboard where you’ll find account related details such as keys and tokens. Copy Account SID and AUTH TOKEN as we will be needing those credentials.
Since Twilio will work as a bridge between your Rasa bot and your WhatsApp, it charges for using the service. But it also provides a sandbox environment which is only active for 24 hour. That is enough for us to test our bot and if you need it for longer period just activate the whatsapp number again.
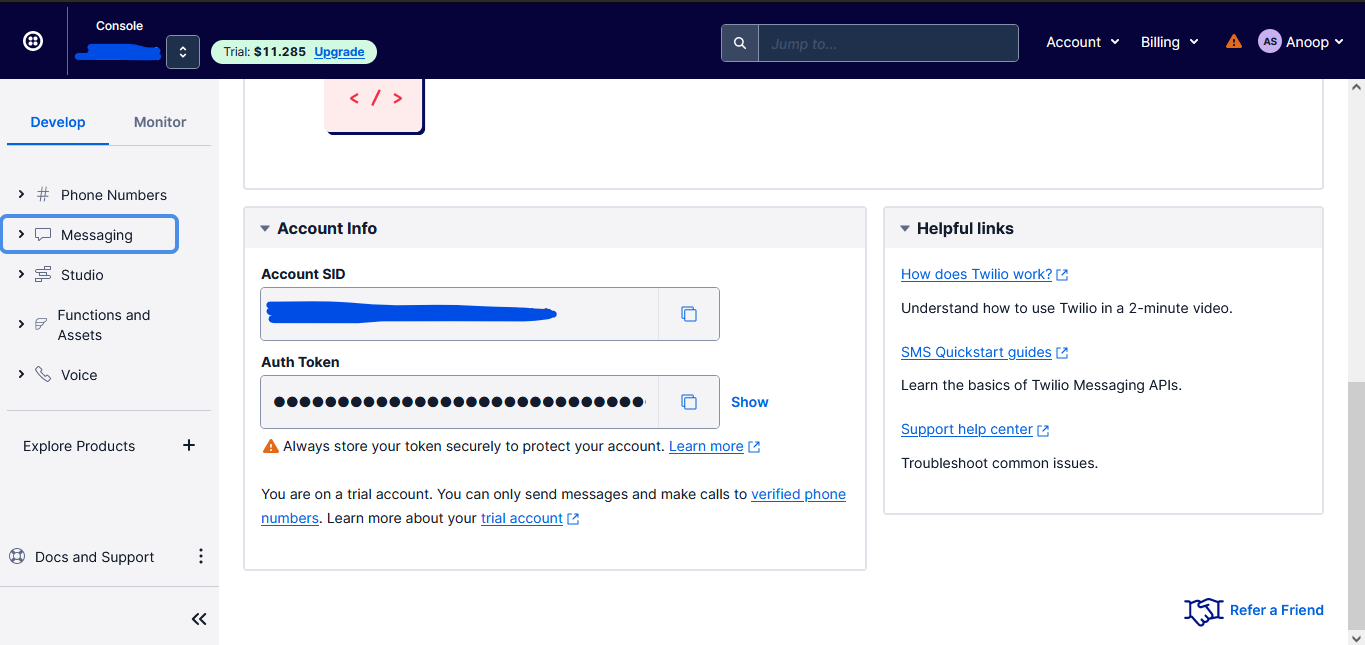
To get the whatsapp sandbox number, select Messaging and then select Settings inside it, you’ll see something like this
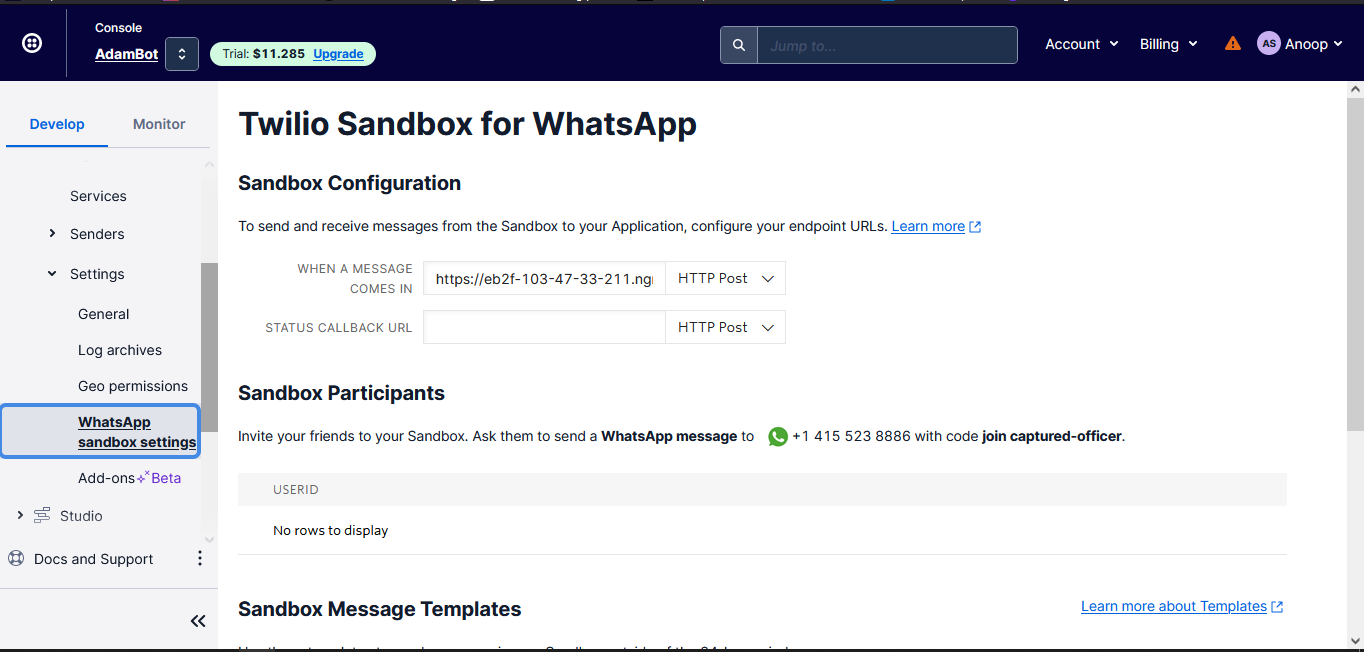
In here you will find the WhatsApp number, save it in your contacts as this number will be the point of contact for us with the Rasa bot. Now we have all the 3 items that we required from Twilio. Let’s move to the next section
Update our Code
Open the code in any code editor and select credentials.yml file to edit. Update the given below fields inside your credentials.yml file. If it is not present in your file add it anywhere in your file.
twilio:
account_sid: "ACbc2dxxxxxxxxxxxx19d54bdcd6e41186"
auth_token: "e231c197493a7122d475b4xxxxxxxxxx"
twilio_number: "+440123456789" # if using WhatsApp: "whatsapp:+440123456789"
Code language: Python (python)That’s it. Now start the server using command rasa run in your terminal.
Start NGROK
Rasa server by default runs on port 5005, So to put our local server on secure https server do the following steps.
- Open Ngrok and type the following
G:\>ngrok.exe http 5005 - Ngrok will then provide you two masked URLs one will be on http and other would be on https. It will look something like this.

You have the https url for your Rasa server running on localhost. Add the following next to the url
URL – NGROK_HTTPS_URL/webhooks/twilio/webhook
Copy this updated URL and paste it in the same place as shown below and save the changes.

You are all set now! Go back to your whatsapp account and open the chat with the sandbox number you just saved in the first step.
My sandbox environment says Invite your friends to your Sandbox. Ask them to send a WhatsApp message to +1 4xxxxxx86 with code join captured-officer. Your might say something different but you only have to send the required text from your account on the sandbox number. If you send the rightcode you will get something like this
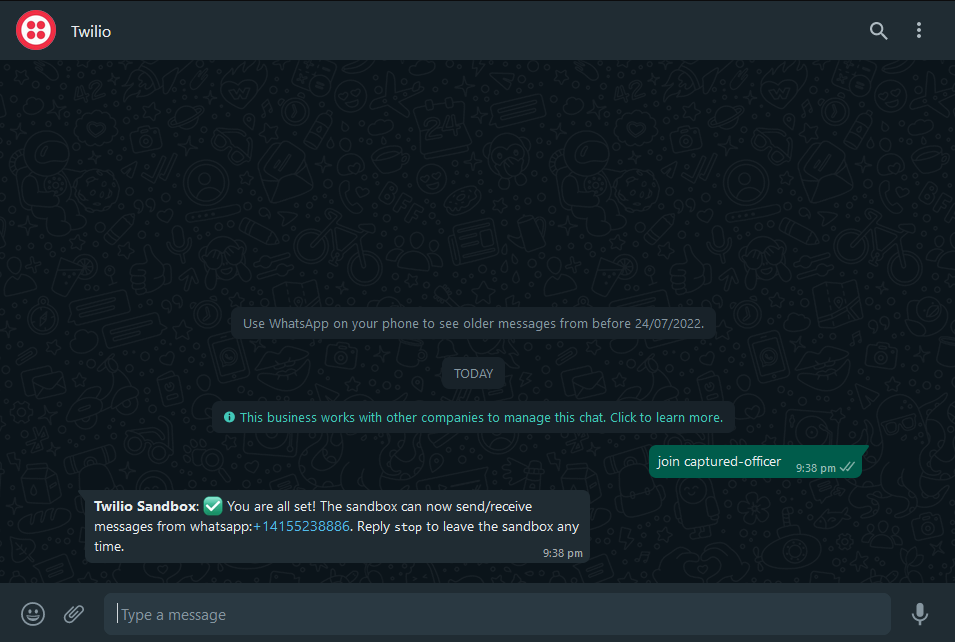
Great! You can start interacting with your rasa model now. Send Hi
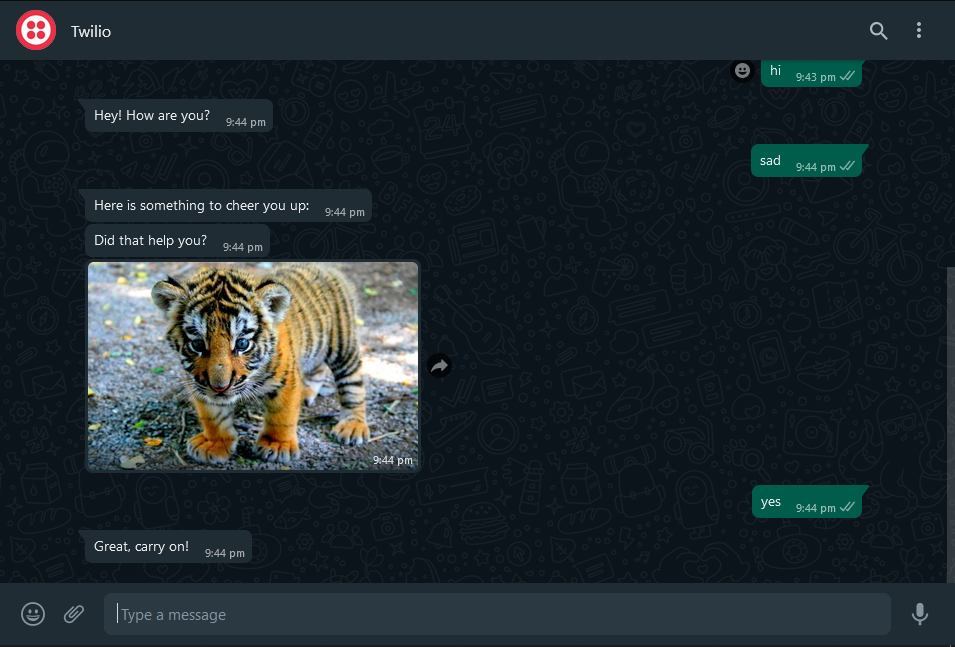
That’s it folks for this article, You now have a working WhatsApp bot which you can share with your friends and family to test with.
You can clone the code from Github repo Connect WhatsApp with Rasa


